Showing posts with label Crafts. Show all posts

3.26.2010

Eco-Project: Brown Paper Wrapping

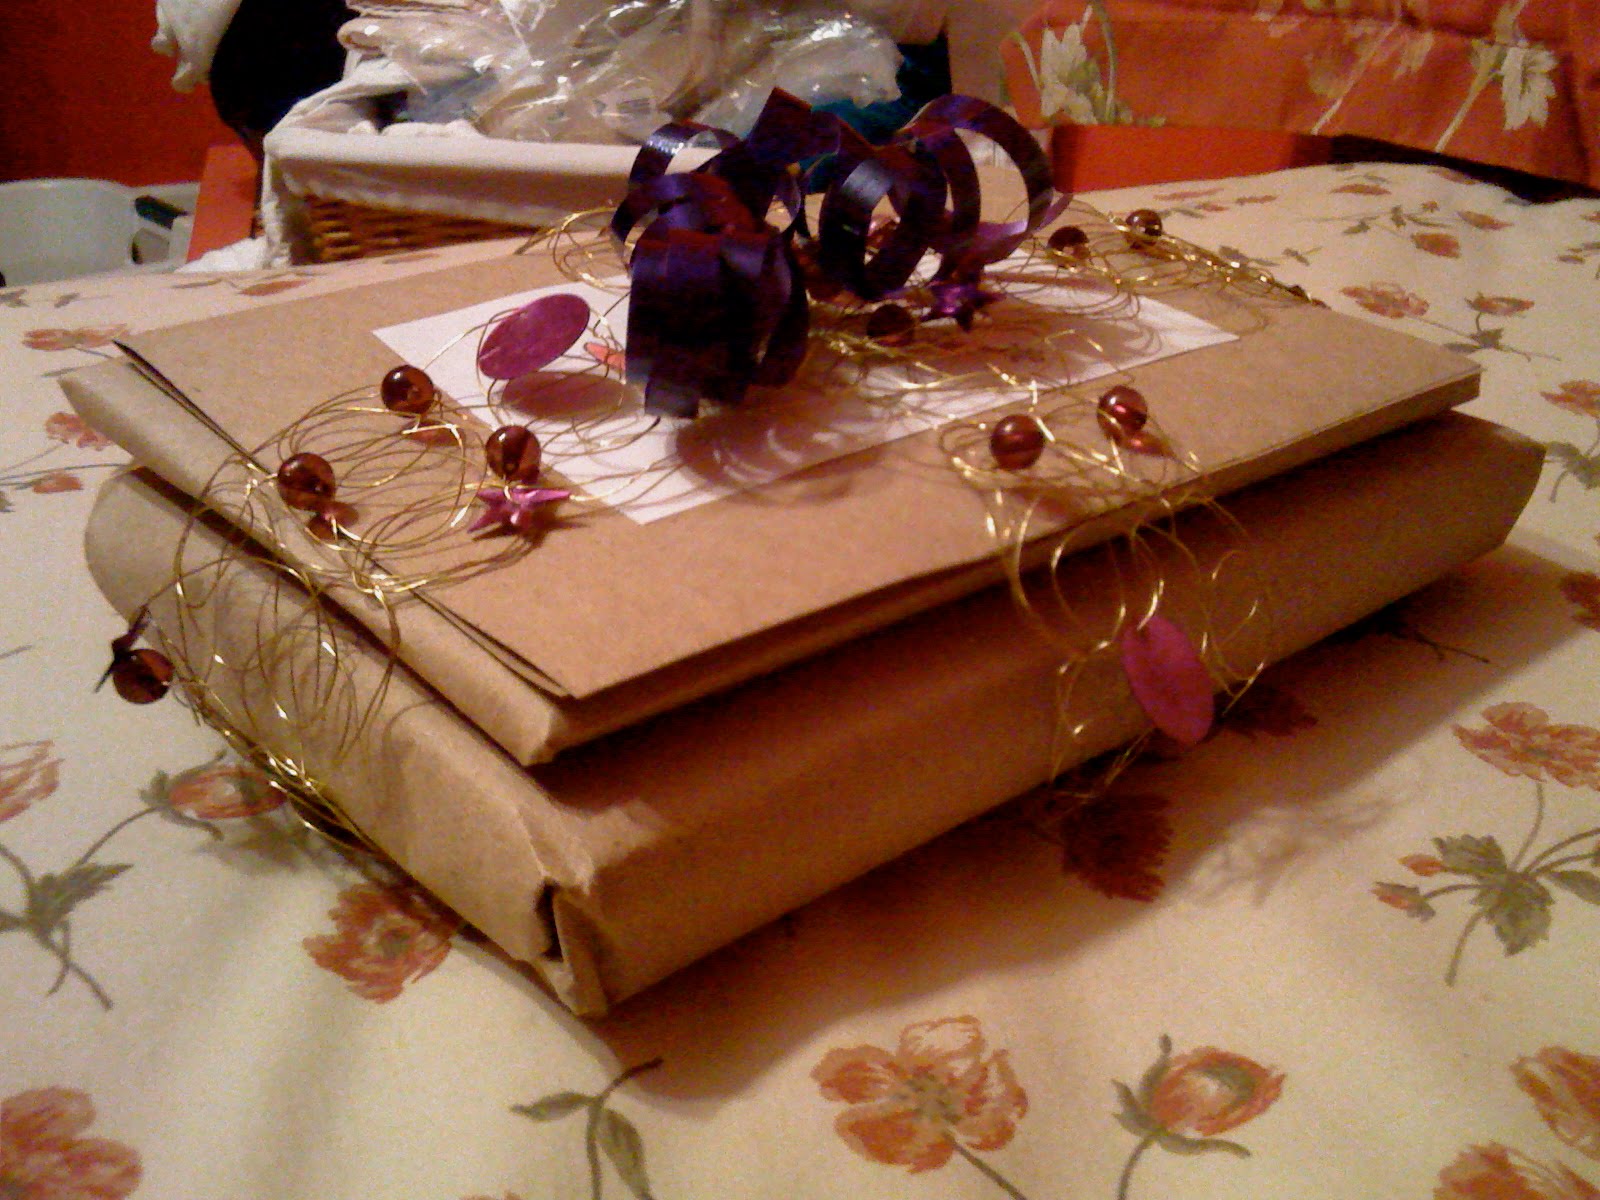
Less is more. That's my view on things. So when you have a great wrapping accessory, like a garland or a gorgeous bow, you need not use outlandish paper--you also shouldn't have to spend a ton of money. That's why brown paper makes such an attractive and useful wrap; it draws more attention to the accessories, you'll often have it on hand, and it's a great way to recycle.

For small gifts, a plain old paper shopping bag works just fine. For larger gifts, a big roll of sturdy, brown paper costs about 15 bucks and lasts forever. I always steal some from my mom when I'm home; my brother is still in high school and they make him use it to cover his text books (and you thought wrapping a gift was pointless). Packaging tape works best for this because regular Scotch tape wasn't designed to handle heavy-duty materials.

On the particular gift pictured, the brown paper gave me an opportunity to use the garland I bought from Pier One's awesome Christmas clearance sale. It's a funky gold-colored wire looped around itself and adorned with purple beads and stars. Once again, I apologize for the iPhone photo; in person it looked spectacular, especially against my floral bed sheets. I could not resist.

Using brown paper is possibly my favorite way to wrap. Instead of going out and buying different paper for every occasion, it's just so easy to have the single roll of brown paper on hand, and then to buy the awesome accessories, which usually hit the sales rack for cents apiece pretty quickly. I know, it sounds lazy, but the final product ends up looking so chic.

But yes. It is the perfect solution if you happen to be lazy.

3.15.2010

Eco Project: Home Made Envelopes

I had a pen pal when I was a kid, and I always made my own envelopes out of old calendar pictures. I wanted to see if this would translate well into adulthood. Here's how it's done.

Like I said, I used to use old calendar photos. For this project I classed it up a bit using a black and white ad featured in W Magazine, but obviously you can use essentially any paper you want. Unfold an envelope of your choice and trace it onto the paper like this:


Then, fold and glue your new envelope together in the same way the envelope template was constructed.


As you can see from the photo above, I love plain, white note cards without lines. They're great for academic stuff, but I also love writing little notes and cards on them with a black pen.


Because my envelope was black, I addressed it with a silver pen. By the way, it's perfectly fine to send these through the mail; these envelopes would be a great excuse to send a good, old fashioned letter for no real reason at all. I hear people used to love that.

So I don't know, this might not be a grownup project but it's definitely fun for kids, and a good way to fake a decorative card last minute. Also, sorry for the poor quality photos, they were done on my iPhone. Let me know what you think!

3.12.2010

Eco Project: Paper Strips


If you have a small gift to wrap, you don't need any conventional accessories to wrap it in a fun way. To cover this small box, I just used a plain sheet of printer paper. To create ribbons, I took a few scraps of colored construction paper and cut them into long, thin strips. Then I gathered a few and held them together in a row with a piece of tape at the end. I taped that end to the bottom of the gift and wrapped the rest around, taping the other side. I repeated for another, overlapping strand. The gift looked nice after this stage, but I decided to add a little extra by wrapping thicker, shorter strips of paper around a pencil and then sliding the edges underneath the thiner, taped strips. They look like whimsical antlers to me.

What's great about this project is that you can use old magazines, calendars, or other re-purposed paper and it will look good. It's also useful if you only have a tiny swatch of your favorite gift wrap left but you don't want to toss it. Just cut it into strips and tape it everywhere, that's what I always say.

Happy weekend! More gift wrapping ideas next week.

2.21.2010

How to Wrap a Gift With...Aluminum Foil?

Yes, you read it correctly. In keeping with this week's theme of metallic wrap, I wanted to show you a way you could create a whimsical gift using something you might already have at home. Decorating with aluminum foil is a great way to wrap if you're still novice and don't have time for perfection, or, if you are a boy and like household things that are shiny. Let's begin, shall we?

You need several materials for this project:


You'll need one sheet of aluminum foil, large enough to cover the entire object you're wrapping (duh). Just a guesstimate usually works for me.


You'll also need scissors, tape (I find package tape works best for non-traditional wrapping materials), ribbon, glue, glitter, and a gold decorative plate to display it on. Just kidding on that last thing. Also, you're free to play with decorations in whatever way you choose. Want to glue buttons on your gift? Knock yourself out.

And of course, you'll need the perfect gift. I'll be wrapping The Sartorialist by visionary street fashion photographer Scott Schuman. It is based off his world famous blog, and is a great gift for a lover of fashion, photography, cities, and people watching; I highly recommend it. (It is published by the Penguin Group)

Now onto the steps:


1) Lay your gift face down on the aluminum foil. I decided for the dull side to be the side that shows on the outside of the gift, but if you prefer a more flamboyant gift, it's fine to show the shiny side instead.


2) Make a short, inward fold on one long side of the foil and flatten it.


3) Fold one side of the aluminum foil over the book, and then fold the other, making sure the top fold is the one with the folded edge from above. Tape down.


4) Choose one of the two remaining open folds. Press the top and bottom pieces of foil to form a flap, and press it flat against the gift, as shown above. Make a small, inward fold with the edge of the foil.


5) Fold the flap up to meet the bottom side of the package and tape down. Repeat steps 4 and 5 with the other remaining open end.


6) Add a ribbon to the wrapped gift as a finishing touch. (If desired, I will provide a ribbons tutorial one day.) You can be finished here, or you can continue decorating for a more festive gift. See next steps for more.


7) Draw designs of your choice in craft glue all the heck over your gift. I chose the letter S for Sarah because naturally, I wrapped a gift for myself.

8) Coat glue with glitter liberally. Allow about a half hour to dry.

9) Shake off excess glitter and voila! You have a tin foil present! You can't really go wrong with this craft. If it doesn't turn out well it will still make a hilarious conversation piece, and if it does turn out well, it'll look impressive. I'm actually pretty proud, my roommate saw the gift on our coffee table and thought it was silver wrapping paper. Wee!

Let me know what you thought of this craft and please send pics if anyone tries it at home! My email is sromeo@fordham.edu.

2.01.2010

Oh hey, February, what are you doing here?

People do NOT like Valentine's Day. Do you?

I think the hate originates sometime in high school when teenagers start to feel (ugh) feelings and invent unrealistic expectations about romantic, Parisian, Lady and the Tramp-esque dinners on February 14th. Then when that doesn't happen, and you end up making out with some gross basketball player in his parents' rec room until your 11:30 curfew, (or if you were like me in high school, staying in to watch Will and Grace reruns alone), you decide that no sir, V-Day is not for you. Never again will you pay homage to a dumb, cherubic baby with wings and an affinity for archery.

But even at the ripe old age of 22, I actually do like Valentine's Day! I always hark back to the pleasant memory of grade school Valentines: shopping with my mom to pick out the perfect cards, snapping the cardboard's perforated edges into little rectangles and customizing each one for every member of my class, even Yucky Paul who smelled gross and ate erasers. Those were the days.

That's why this year I'd like to try for the 3rd grade approach and hand out fun goodies to all my friends and roommates. Yeah, NSYNC Valentines would be ideal, but I'd like to try a more creative approach. Like these adorable little suckers:


Brooke over at Inchmark came up with this great idea to make tiny candy boxes out of match boxes. Unfortunately I'm not yet creative enough to have come up with a neat idea like this myself, but I think I'm going to try a version of this for my friends this V-Day. I'll probably fill them with dark chocolate, and maybe use a weird/ironic print? Not sure yet, but I'll definitely document and post the process. If you'd like to try Brooke's craft, you can read her directions here.

In the two weeks leading up to the big day, I'll post some more Valentine's Day gift wrap tips and ideas in attempts to extinguish the Cupid hate.